## Features 🐳
1. Vite-based
2. Vue3-compatible
3. File-based routing
4. Layout system
5. Mock support
6. Auto import APIs
7. Auto import components
8. Auto import icons
9. VueUse support
10. TypeScript-friendly
11. UnoCss integration
12. Dark mode support
13. SWR request support
14. Pinia state management
15. pnpm package manager
16. Progress bar for navigation
17. Devtools panel support
18. Plugin auto-loading support
19. Vitest unit testing support
20. Markdown rendering support
21. Path aliases support
22. Command line auto creation and deletion
23. i18n internationalization support
24. Beautiful 404 page support
25. TSX support
26. Gzip resource compression support
27. Environment variable configuration support
28. Unified code style and formatting support
29. Production environment automatically removes development logs
30. defineOptions support
31. Echarts integration
32. Global toast notifications
33. Global axios request wrapping
34. Auto generate type declarations for environment variables
35. `renovate` automatic dependency updates
36. Auto version update and generate `CHANGELOG`
37. Fastest and smallest `dockerfile` for static `go` service with minimal
configuration
38. `base` secure path resolution
39. `lightningcss` support
40. Vite configuration layer support (experimental)
## Clone Template 🦕
1. Github
```shell
git clone git@github.com:dishait/tov-template.git
```
2. Gitee
```shell
git clone git@gitee.com:dishait/tov-template.git
```
3. degit
```shell
npx degit https://github.com/dishait/tov-template#main
```
4. New `Github` repository 👉
[Use this template](https://github.com/dishait/tov-template/generate)
## Node version recommendation 🐎
Since this template is fully geared towards modern development, it is
recommended to use the current long-term maintenance version of `node`, which is
`v20`.
## Use 🐂
This template only supports the `pnpm` package manager. 👉
[Installation guide](https://pnpm.io/zh/installation)
1. Install dependencies
```shell
pnpm install
```
2. Development
```shell
pnpm dev
# Open host
pnpm dev:host
# Auto-open browser
pnpm dev:open
```
3. Preview
```shell
pnpm preview
# Open host
pnpm preview:host
# Auto-open browser
pnpm preview:open
```
4. Build
```shell
pnpm build
pnpm build:debug
```
5. Unit testing
```shell
pnpm test
```
6. Unit test report generation
```shell
pnpm coverage
```
7. Type checking
```shell
pnpm typecheck
```
8. Auto creation
```shell
pnpm auto:create
```
9. Auto removal
```shell
pnpm auto:remove
```
10. Dependency updates
```shell
# Update dependency version
pnpm deps:fresh
```
```shell
# The above commands only write to the package information file package.json, and need to re-execute the package installation command.
pnpm i
```
11. Code style checking
```shell
pnpm lint
# Fix errors during linting
pnpm lint:fix
```
12. Safe Init
```shell
pnpm safe:init
```
## Motivation 🐗
Why did we create this template?
1. Save time on configuration for future development projects.
2. Integrate modern development architecture with mainstream plugins to improve
development efficiency.
## Use Cases 🐻
When should you use this template?
1. Don't want to waste time on project configuration.
2. Want to try developing web applications in a more modern way and improve
development efficiency.
## Inspiration 🐃
This template is inspired by [vitesse](https://github.com/antfu/vitesse). If you
have an SSR scenario, we recommend that you use
[vitesse](https://github.com/antfu/vitesse).
## Organization 🦔
Welcome to follow **dishait**
- [Official Website](http://dishaxy.dishait.cn/)
- [Gitee](https://gitee.com/dishait)
- [Github](https://github.com/dishait)
- [NetEase Cloud Classroom](https://study.163.com/provider/480000001892585/index.htm?share=2&shareId=480000001892585)
## Details 🐳
### [1. Vite](https://cn.vitejs.dev/)
This template uses **[Vite](https://cn.vitejs.dev/)** as the build tool. You can
configure the project's build in `vite.config.ts` at the root directory.
For the introduction of many mainstream plugins and complex configurations, they
have been integrated into the presets under the root directory. In most cases,
you do not need to reconfigure them.
### [2. Vue3](https://v3.cn.vuejs.org/)
### [3. File-based Routing](https://github.com/posva/unplugin-vue-router)
The directory structure is the route.
For example:
- `src/pages/index.vue` => `/`
- `src/pages/about.vue` => `/about`
- `src/pages/users/index.vue` => `/users`
- `src/pages/users/profile.vue` => `/users/profile`
- `src/pages/users/[id].vue` => `/users/:id`
- `src/pages/[user]/settings.vue` => `/:user/settings`
- `src/pages/[...notFound].vue` => 404 route
For more details, please refer to
[unplugin-vue-router](https://github.com/posva/unplugin-vue-router).
### [4. Layout System](https://github.com/dishait/vite-plugin-vue-meta-layouts)
#### Default Layout
`src/layouts/default.vue` will be used as the default layout.
```html
default
```
At this point, `src/pages/index.vue`:
```html
home
```
When routing to `/`, the page will render:
```html
default home
```
Now, `src/pages/about.vue`:
```html
about
```
When routing to `/about`, the page will render:
```html
default about
```
#### Non-Default Layout
Create a `src/layouts/custom.vue` randomly:
```html
custom
```
At this point, in `src/pages/index.vue`:
```html
home
{
"meta": {
"layout": "custom"
}
}
```
When routing to `/`, the page will render:
```html
custom home
```
See specifically 👉
[vite-plugin-vue-meta-layouts](https://github.com/dishait/vite-plugin-vue-meta-layouts)
### [5. Mock Support](https://github.com/vbenjs/vite-plugin-mock)
In the `mock` directory under the root directory, you can export default `api`
resources in modules.
For example, export from `mock/test.ts`:
```ts
import { MockMethod } from "vite-plugin-mock";
export default [
{
url: "/api/mock/get",
method: "get",
response: () => {
return {
code: 0,
data: {
name: "vben",
},
};
},
},
] as MockMethod[];
```
You can then make mock requests in the `src` directory.
```html
data: {{data}}
loading: {{loading}}
error: {{error}}
```
Here we use [vue-request](https://cn.attojs.org/) to make requests, but since
this `mock` intercepts an entire interface, it is also possible to use request
libraries such as `axios`.
### [6. Api Auto Import](https://github.com/antfu/unplugin-auto-import)
The original `vue` `api` needs to be manually `import`ed.
```ts
import { computed, ref } from "vue";
const count = ref(0);
const doubled = computed(() => count.value * 2);
```
Now it can be directly used.
```ts
const count = ref(0);
const doubled = computed(() => count.value * 2);
```
And the above `api` is automatically imported on demand.
Currently, the template supports automatic import of libraries that support
auto-importing `api`.
- `vue`
- `vuex`
- `pinia`
- `vue-i18n`
- `vue-router`
- `@vueuse/core`
- `@vueuse/head`
- `@vueuse/math`
Just make sure to install the dependencies and see the specific details here
👉
[vite-auto-import-resolvers](https://github.com/dishait/vite-auto-import-resolvers#%E9%BB%98%E8%AE%A4%E6%94%AF%E6%8C%81%E5%88%97%E8%A1%A8),
Of course, there are also automatic imports in projects, just need to meet the
following specifications.
1. The export from `src/composables` will be automatically imported as needed.
For example, there is a `src/composables/foo.ts` file:
```ts
// default export
export default 1000;
```
1. No need for `import` at this point.
```html
{{store.counter}}
```
2. The export from `src/stores` will be automatically imported as needed.
For example, there is a `src/stores/counterStore.ts` file:
```ts
// default export
export default defineStore("counter", {
state() {
return {
counter: 1,
};
},
actions: {
inc() {
this.counter++;
},
},
});
```
At this point, there is no need for `import` anymore.
```html
{{store.counter}}
```
3. `src/api` is also automatically imported on demand, similar to the above.
You can see more details in the
[unplugin-auto-import](https://github.com/antfu/unplugin-auto-import)
documentation.
### [7. Automatic component importing](https://github.com/antfu/unplugin-vue-components)
It turns out that `import` is required.
```html
```
Now, any components defined in the `src/components` directory will be
automatically imported on demand, meaning that `import` statements are not
required.
```html
```
Of course, it also supports nested components, such as
`src/components/foo/bar.vue` 👇
```html
```
Automatic importing of popular component libraries is also supported, such as
`Naive ui`.
You only need to install the dependency.
```shell
pnpm add naive-ui
```
Then you can use it in your templates.
```html
Success
```
Currently supported component libraries are:
- [vant](https://github.com/youzan/vant)
- [idux](https://github.com/IDuxFE/idux)
- [devui](https://github.com/DevCloudFE/vue-devui)
- [quasar](https://github.com/quasarframework/quasar)
- [varlet](https://github.com/varletjs/varlet)
- [inkline](https://github.com/inkline/inkline)
- [vuetify](https://github.com/vuetifyjs/vuetify)
- [naive-ui](https://github.com/TuSimple/naive-ui)
- [primevue](https://github.com/primefaces/primevue)
- [layui-vue](https://gitee.com/layui/layui-vue)
- [view-design](https://iviewui.com/)
- [arco-design](https://github.com/arco-design/arco-design)
- [element-plus](https://github.com/element-plus/element-plus)
- [ant-design-vue](https://github.com/vueComponent/ant-design-vue)
- [@headlessui/vue](https://github.com/tailwindlabs/headlessui)
- [tdesign-vue-next](https://github.com/Tencent/tdesign-vue-next)
- [@vueuse/components](https://github.com/vueuse/vueuse/tree/main/packages/components)
Please refer to 👉
[unplugin-vue-components](https://github.com/antfu/unplugin-vue-components)
### [8. Automatic icon importing](https://unocss.dev/presets/icons)
You can go to [icones](https://icones.netlify.app/) and click on any icon
library you like.
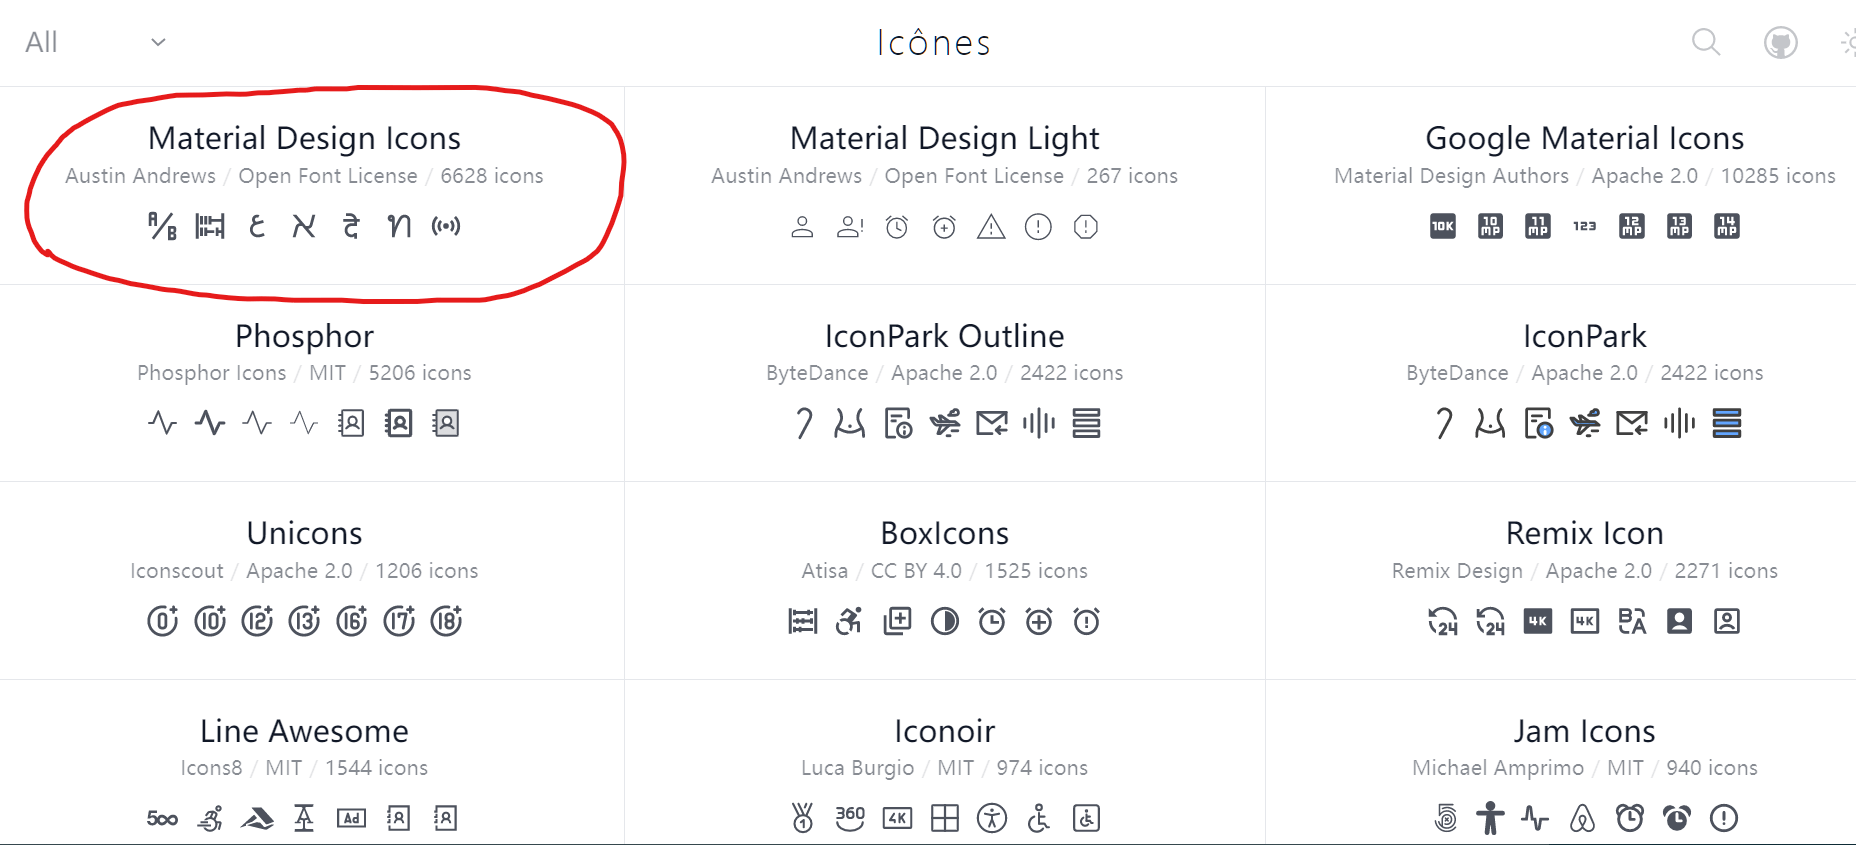
Then click on one of the icons you like.
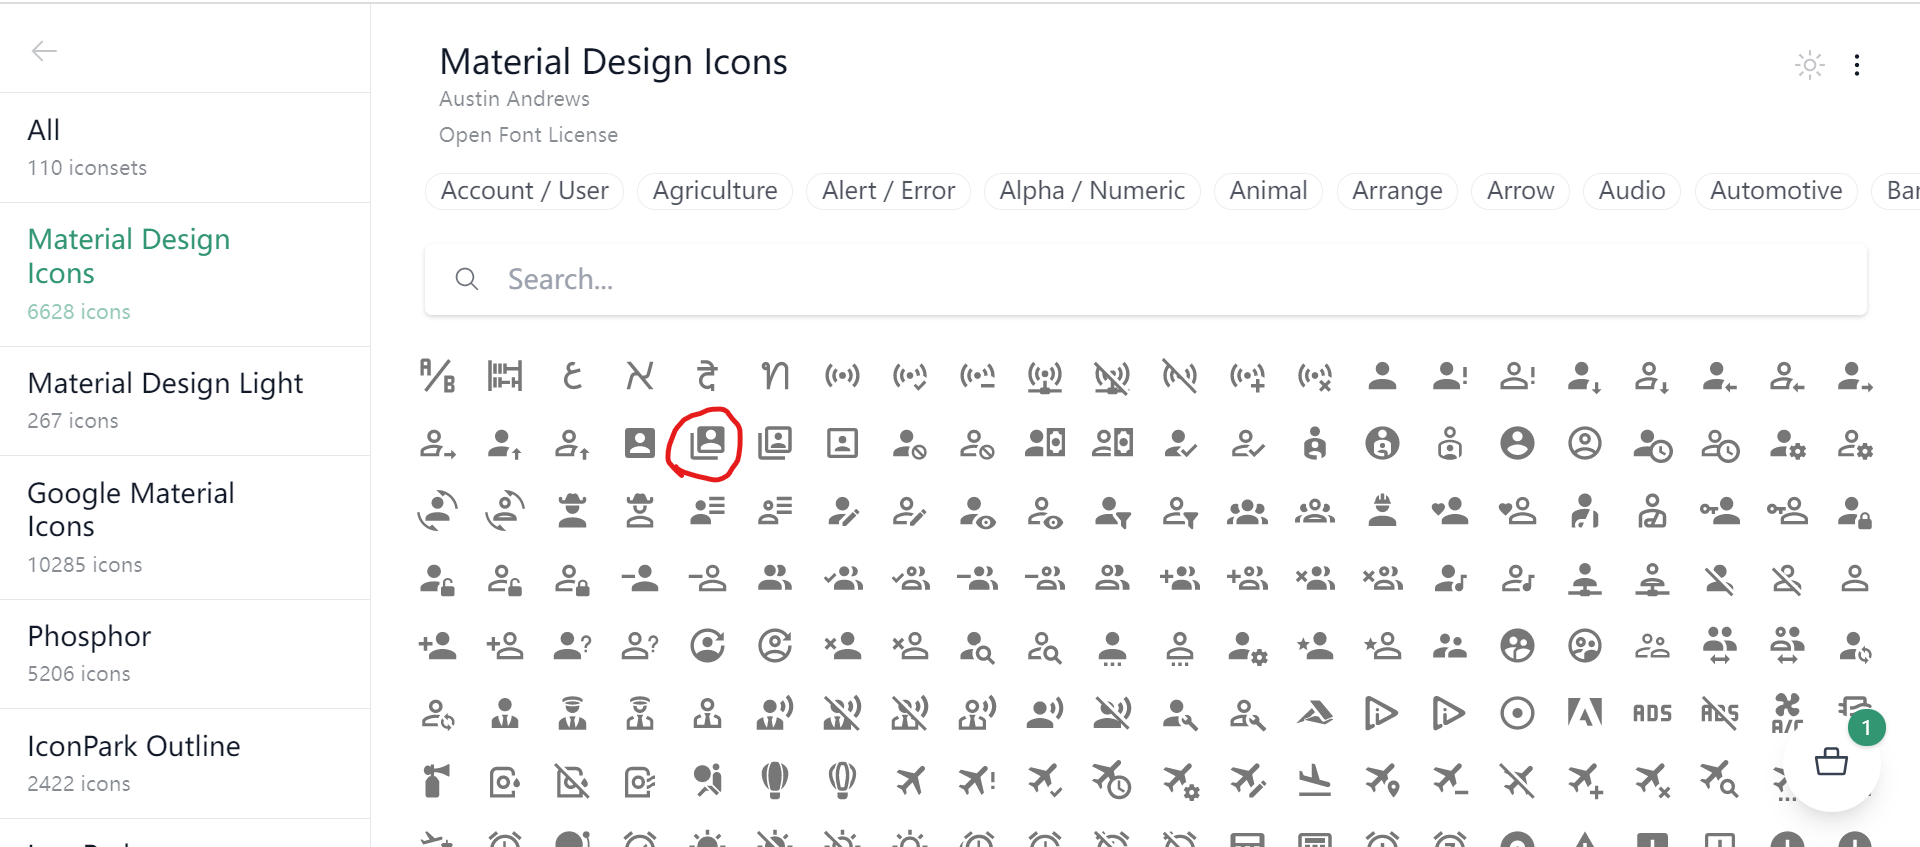
Copy its name.
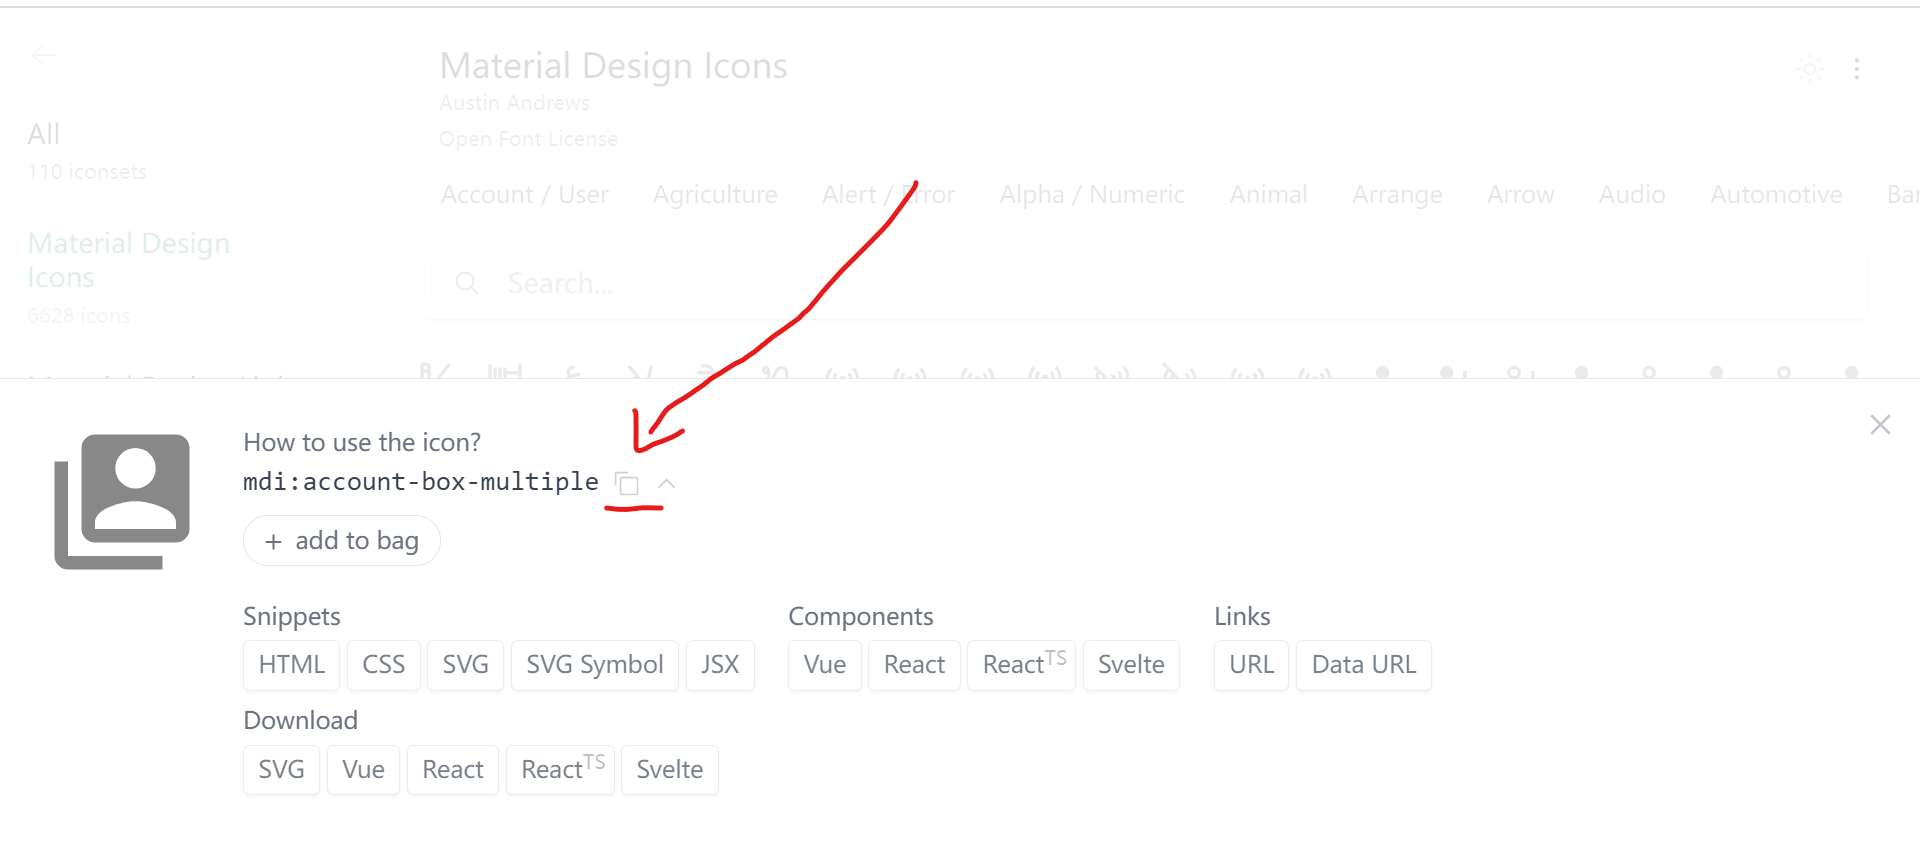
In the template, you can use it directly through the `class` method, remember to
add the prefix `i-`.
```html
```
After saving, wait for the automatic download of theAfter saving, wait for the
automatic download of the icon library and you can see the corresponding icon in
the page.
I also recommend using the `vscode` plugin
[Iconify IntelliSense](https://marketplace.visualstudio.com/items?itemName=antfu.iconify).
This plugin displays a preview of the icons in the template.
Of course, dynamic loading of icons is also supported:
```html
```
Please note that for dynamic icons, make sure to test all the icons in the
development environment.
For more information, please refer to
[unocss/presets/icons](https://unocss.dev/presets/icons).
### [9. VueUse Support](https://vueuse.org/)
`VueUse` is a powerful `hooks` library. For example, if you want to get the
mouse position, you only need to do this:
```html
x {{x}}
y {{y}}
```
Please refer to 👉 [VueUse](https://vueuse.org/)
### [10. TypeScript's](https://www.tslang.cn/)
You don't need to reconfigure, just write it in `ts` directly.
### [11. unocss's](https://unocss.dev/)
`unocss` is a faster development `atomic CSS` library.
You can use it directly in the template, no configuration is needed.
```html
I am white text on a red background.
```
The above template will render white text on a red background.
It also supports [attribute mode](https://unocss.dev/presets/attributify), which
means you can use shorthand notation.
```html
I am white text on a red background.
```
This can reduce the amount of code when adjusting margin sizes, among other
things.
For more information, please refer to [unocss](https://unocss.dev/).
### [12. Dark mode support](https://github.com/dishait/vue-dark-switch)
Dark mode is implemented by
[vue-dark-switch](https://github.com/dishait/vue-dark-switch).
```html
```
Please refer to 👉 [vue-dark-switch](https://github.com/dishait/vue-dark-switch)
### [13. SWR Request Support](https://cn.attojs.org/)
SWR is a more modern way of making requests, for more information please refer
to the article 👉 [SWR](https://zhuanlan.zhihu.com/p/89570321).
And [vue-request](https://cn.attojs.org/) is a Vue version request library for
SWR.
You can use it like this, for example, to request `/api/test`
```html
data: {{data}}
error: {{error}}
loading: {{loading}}
```
All the basic data, state, and caching are handled for you, so there's no need
to re-wrap things.
For more information, please refer to [vue-request](https://cn.attojs.org/).
### [14. Pinia State Management](https://pinia.vuejs.org/)
`Pinia` is the next-generation state management library, which is simpler than
`Vuex` and has better TypeScript support.
You can define your states in the `src/stores` directory.
For example, create a `src/stores/counter.ts` file:
```ts
// src/stores/counter.ts
import { defineStore } from "pinia";
export const useCounterStore = defineStore("counter", {
state() {
return { count: 0 };
},
actions: {
inc() {
this.count++;
},
},
});
```
After defining it, you can use it directly in the `setup`.
```html
```
### 22. Command Line Auto Create and Remove
To create a standard page or component just enter 👇,
```shell
pnpm auto:create
```
Of course, you can also delete 👇,
```shell
pnpm auto:remove
```
### [23. i18n Internationalization Support](https://github.com/intlify/bundle-tools/tree/main/packages/vite-plugin-vue-i18n)
In daily business, there may be some scenarios that require
internationalization. Then you only need to define different languages' `yml` in
the `locales` directory at the root level to achieve out-of-the-box
internationalization support in the project.
For example, `locales/en.yml` is used to define the English content that
requires internationalization support.
```yml
# locales/en.yml
# English
index: index
about: about
not-found: Notfound
```
For example, `locales/简体中文.yml` is used to define the Chinese content that
requires internationalization support.
```yml
# locales/简体中文.yml
# 中文
index: 主页
about: 关于
not-found: 未找到页面
```
You can use it in components like this at this time 👇
```html
language: {{ t('index') }} click me!!
```
For more detailed instructions, please refer to the
[@intlify/vite-plugin-vue-i18n](https://github.com/intlify/bundle-tools/tree/main/packages/vite-plugin-vue-i18n)
and [vue-i18n](https://github.com/intlify/vue-i18n-next).
In addition, `yml` is a popular configuration file format in frontend
development, and you can find its syntax in Mr. Ruan Yifeng's tutorial:
[YAML Language Tutorial](http://www.ruanyifeng.com/blog/2016/07/yaml.html).
Here are some recommended VS Code plugins:
- Multifunctional `i18n` support:
[i18n Ally](https://marketplace.visualstudio.com/items?itemName=Lokalise.i18n-ally)
For more detailed instructions, please refer to the
[@intlify/vite-plugin-vue-i18n](https://github.com/intlify/bundle-tools/tree/main/packages/vite-plugin-vue-i18n)
and [vue-i18n](https://github.com/intlify/vue-i18n-next).
In addition, `yml` is a popular configuration file format in frontend
development, and you can find its syntax in Mr. Ruan Yifeng's tutorial:
[YAML Language Tutorial](http://www.ruanyifeng.com/blog/2016/07/yaml.html).
Here are some recommended VS Code plugins:
Multifunctional `i18n` support:
[i18n Ally](https://marketplace.visualstudio.com/items?itemName=Lokalise.i18n-ally)
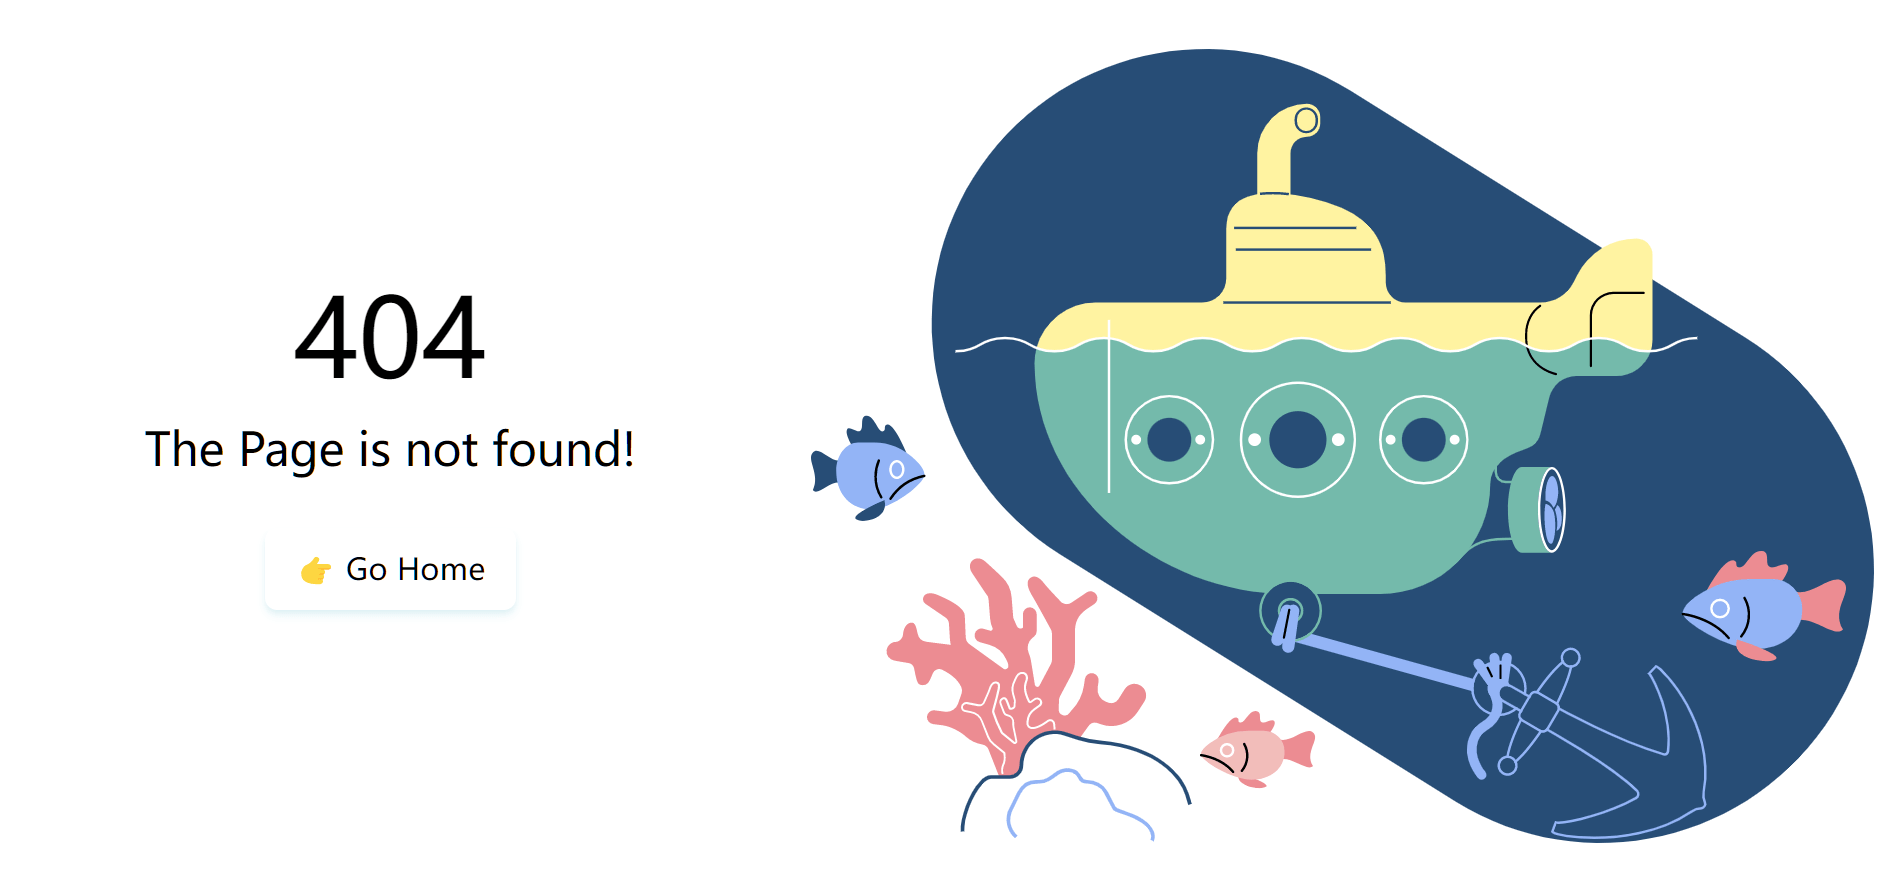
### 24. Beautiful `404` Page Support
In daily business, when a user visits a non-existent page, they should be given
an information prompt that the page does not exist, and this prompt page is the
`404` page.
You can visit any non-existent page at random, for example `/bucunzai`
Of course, there is also dark mode adaptation.
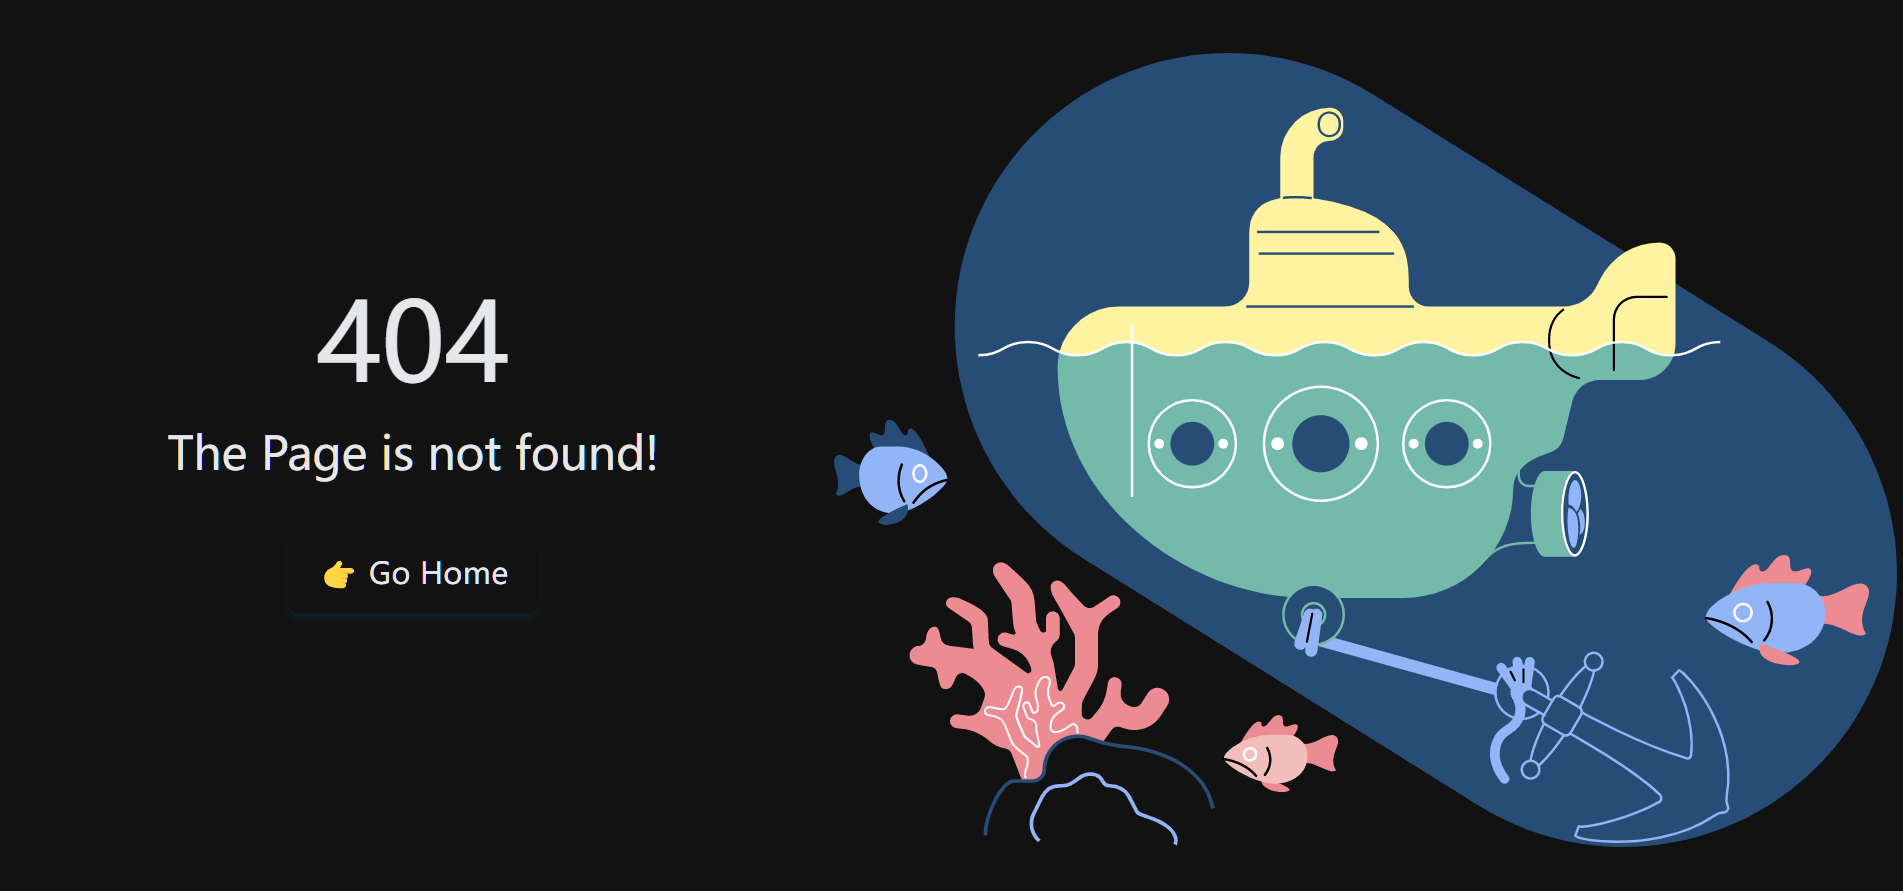
It also supports simple responsive adaptation. For example, it will display
correctly on mobile browsers.
If the cover of this `404` page does not meet your taste, you can modify the
`src` attribute of the `img` tag in `pages/[...notFound].vue`. The default is
`32.svg`, supporting `1 ~ 33` `svg`.
For example, the default is:
```html
 ```
To change the cover to `/notFound/33.svg`, modify it as follows:
```html
```
To change the cover to `/notFound/33.svg`, modify it as follows:
```html
 ```
This will switch the cover to:

```
This will switch the cover to:

### 25. [`tsx` Support](https://github.com/vitejs/vite/tree/main/packages/plugin-vue-jsx)
You only need to place the `.tsx` file under `src/components`, and you can
directly use it in the template.
For example, if you have a `src/components/foo.tsx` file, you can directly use
it in the template.
```tsx
// src/components/foo.tsx
export default defineComponent({
render() {
return Test
;
},
});
```
```html
```
For more details, please refer to:
[@vitejs/plugin-vue-jsx](https://github.com/vitejs/vite/tree/main/packages/plugin-vue-jsx)
### 26. [`gzip` Resource Compression Support](https://github.com/vbenjs/vite-plugin-compression)
Out-of-the-box `gzip` resource compression in production environment, no
configuration required.
For more details, please refer to:
[vite-plugin-compression](https://github.com/vbenjs/vite-plugin-compression)
### 27. [Environment Variable Configuration Support](https://cn.vitejs.dev/guide/env-and-mode.html)
The `.env` file in the root directory is used to configure environment variables
for the project.
### 28. Unified Code Standards and Style Support
Code style verification provided by [eslint](https://github.com/eslint/eslint)
and code standardization using [prettier](https://github.com/prettier/prettier).
Provided by [husky](https://github.com/typicode/husky) +
[lint-staged](https://github.com/okonet/lint-staged) during `commit`
verification.
### 29. [Automatic Removal of Development Logs in Production Environment](https://github.com/dishait/vite-plugin-removelog)
In the production environment, logs such as `console.log`, `console.warn`, and
`console.error` will be automatically removed to avoid the leakage of
development logs.
For more details, please refer to:
[vite-plugin-removelog](https://github.com/dishait/vite-plugin-removelog)
### 30. [defineOptions Support](https://vuejs.org/api/sfc-script-setup.html#defineoptions)
```html
```
### 31. [Echarts Support](https://github.com/ecomfe/vue-echarts)
A simple integration with [vue-echarts](https://github.com/ecomfe/vue-echarts),
please refer to the documentation of
[echarts](https://github.com/apache/echarts) and
[vue-echarts](https://github.com/ecomfe/vue-echarts).
### 32. [Global Toast Notification](https://github.com/euvl/vue-notification)
Integrated with [vue-toastification](https://github.com/euvl/vue-notification),
you can use it in all files under the `src` directory:
```ts
// Any file under the `src` directory is available.
toast.info("info");
toast.error("error");
toast.warning("warning");
toast.success("success");
```
For more details, please refer to:
[Global Toast Notification](https://github.com/euvl/vue-notification)
### 33. [Global Axios Request Wrapper](https://www.axios-http.cn/)
The [axios](https://www.axios-http.cn/) is wrapped, and you can use it in all
files under the `src` directory:
```ts
// Available in any file under src
http.get("...");
http.post("...", { name: "张三", age: 20 });
// ... and so on
```
The above `http` is an instance created separately by `axios`, with simple error
prompts and response data conversion. For more details, please refer to
`src/composables/http.ts`.
If you prefer a reactive style and `swr`, you can use it together with
[vue-request](https://github.com/attojs/vue-request).
```ts
import { useRequest } from "vue-request";
const { data, error, loading } = useRequest(() => http.get("..."));
loading.value; // loading
error.value; // error
data.value; // data
```
The `http` instance's `baseURL` takes the value from the environment variable
file `.env` for `VITE_API_BASE_URL`, defaulting to `/api`, which can be changed
according to your needs.
For more details, please refer to 👉 [axios](https://www.axios-http.cn/).
### 34. [Automatic Generation of Environment Variable Type Declarations](https://github.com/dishait/vite-plugin-env-types)
In Vite projects, we can set environment variables in `.env` and use them in the
frontend source code through `import.meta.env`, but the type hinting is poor.
This feature can automatically generate type declarations to achieve real-time
type hinting, so you don't need to worry about and manage them manually.
For more details, please refer to:
[vite-plugin-env-types](https://github.com/dishait/vite-plugin-env-types).
### 35. [`renovate` Automatically Updates Dependencies](https://github.com/renovatebot/renovate)
The [renovate](https://github.com/marketplace/renovate) bot on GitHub will
periodically check dependencies on GitHub and raise a `pr` to update the
repository, with the update strategy available at:
[unjs/renovate-config](https://github.com/unjs/renovate-config).
Of course, you can also manually execute it to update:
```shell
pnpm deps:fresh
```
For more details, please refer to:
[renovate](https://github.com/renovatebot/renovate)
### 36. [Automatic Version Update and Generating `CHANGELOG`](https://github.com/unjs/changelogen)
When we execute `pnpm run release`, it will automatically update the version and
update the `CHANGELOG.md` file.
For more details, please refer to:
[unjs/changelogen](https://github.com/unjs/changelogen).
### 37. [Fastest and Smallest `dockerfile` for Static `go` Service](https://github.com/PierreZ/goStatic)
The `dockerfile` in the root directory configures the smallest and fastest
container for a static `go` service, making it more convenient for cloud
container services.
For more details, please refer to:
[PierreZ/goStatic](https://github.com/PierreZ/goStatic).
### 38. Base Secure Path Resolution
In Vite, if we change the `base` in `vite.config.ts`, it causes the resource
paths and route paths to become invalid. Using `safeResolve` can ensure that the
same `base` is used in both development and production environments.
```html
![]() ```
```
### 39. `lightningcss` Support
Now it will automatically detect whether the current project supports
[lightningcss](https://cn.vitejs.dev/guide/features.html#lightning-css) and
enable it intelligently.
### 40. Vite Config Layer Support (Experimental)
Now in `tov-template`, we can use the form of `vite.config.[mode].ts` to support
configuration files for different environments.
1. Only vite.config.ts is selected when there is no specific mode.
2. When both vite.config.ts and vite.config.dev.ts exist, their configurations
are merged during development, with the configuration in vite.config.dev.ts
having higher priority.
3. When both vite.config.ts and vite.config.prod.ts exist, their configurations
are merged during production, with the configuration in vite.config.prod.ts
having higher priority.
This feature is supported by
[vite-layers](https://github.com/markthree/vite-layers).
## License
Made with [markthree](./LICENSE)
Published under [MIT License](./LICENSE).